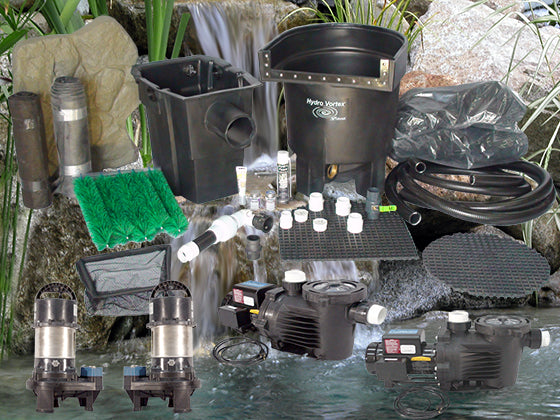
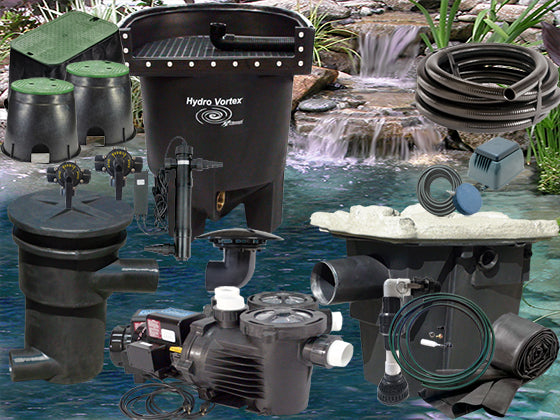
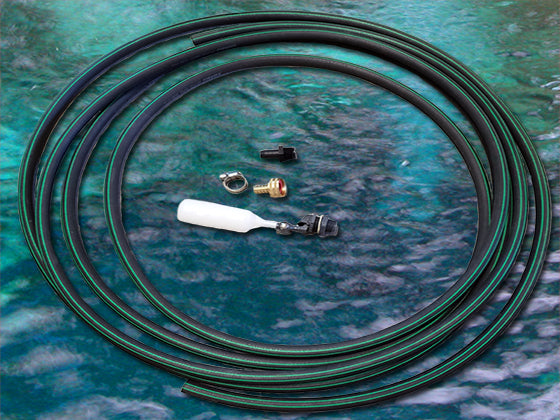
Get a Custom Ultimate Pondless Waterfall Kit Quote
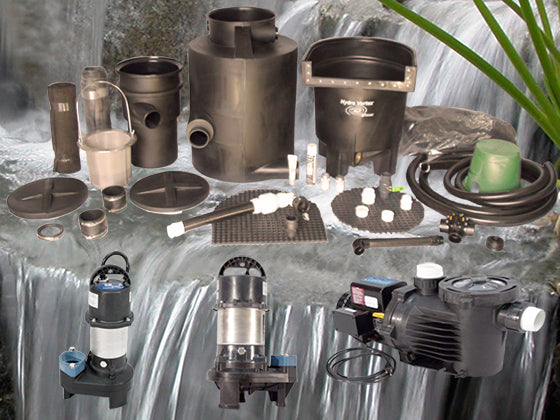
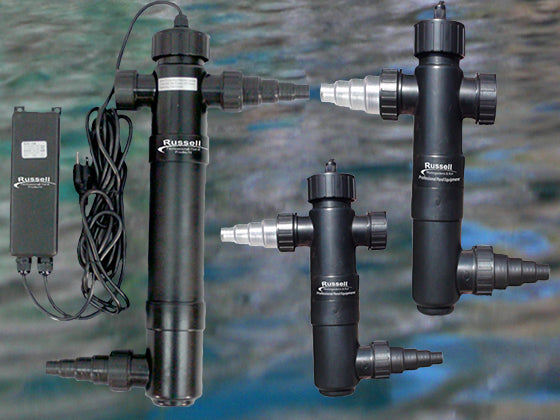
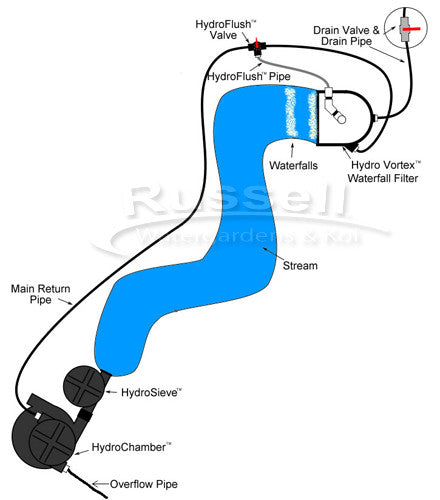
The ULTIMATE Pondless Waterfall is the only completely filtered pondless waterfall system. The ULTIMATE Pondless Waterfall is both pre-filtered, and biologically filtered. The system also utilizes a tank for the water storage instead of the impossible to clean rock and gravel reservoir basins that other pondless systems feature.
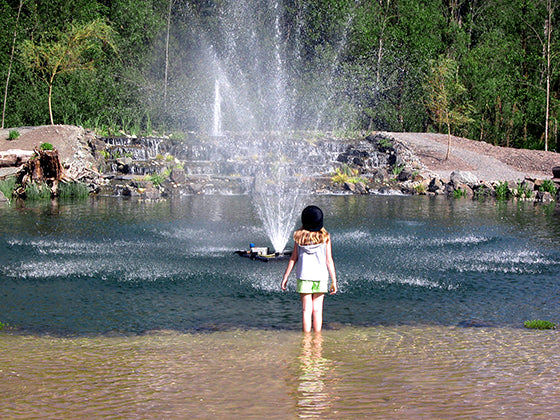
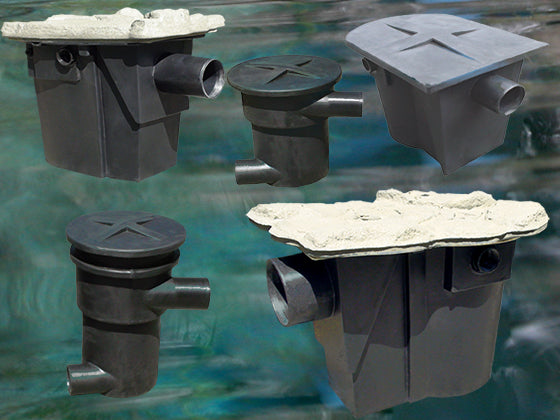
The system is “pondless” because when the pump is turned off – all the water is captured and stored out of sight inside the HydroChamber™.
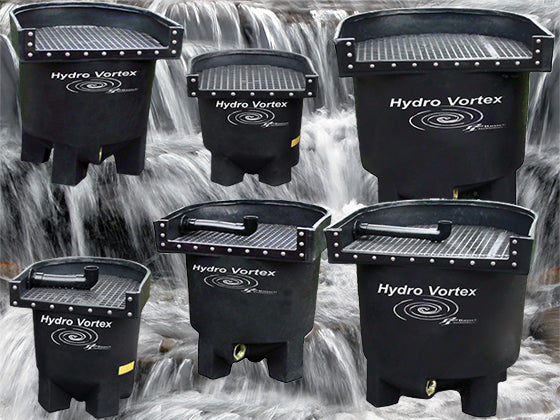
Cleaning the ULTIMATE Pondless Waterfall is easy – simply empty the leaves and debris from the HydroSieve™ pre-filter, and backwash the Hydro Vortex™ waterfall filter with your choice of backwash options: Manual, or with the HydroFlush™ self-cleaning backwash system.
The first step in learning how to build a pondless waterfall is to create a drawing of the pondless water feature you are envisioning. If you need help, simply give us a call – we’re here to help you. You’ll be able to make as many changes to your pondless waterfall drawing as you wish – make it longer, shorter, have more curves, less curves – you’re in charge. Once you’re fairly satisfied with the pondless waterfall drawing, it’s time for the next step.
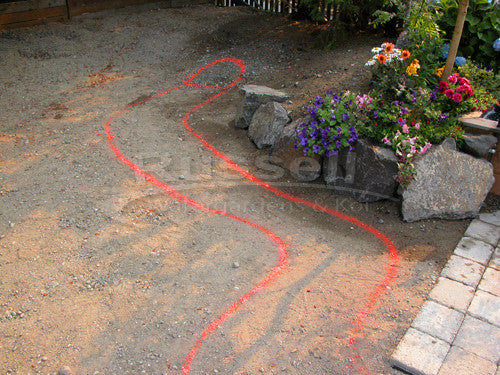
The next step is to paint your pondless design on the ground in actual size. Having it painted on the ground gives you a much better idea of what you are creating.
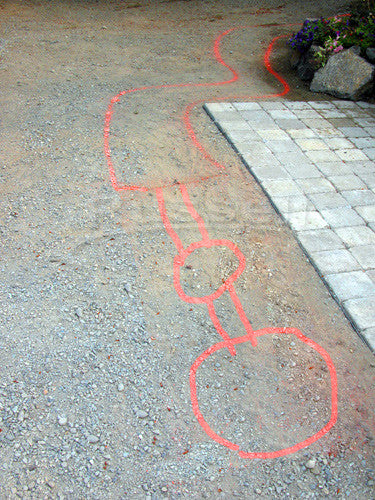
Using your pondless drawing as your guide, first paint where the Hydro Vortex™ waterfall filter will be installed. Then at the other end of your pondless waterfall design, paint where the HydroSieve™ and the HydroChamber™ will be installed.
Then simply paint the stream between the Hydro Vortex™ waterfall filter and the HydroSieve™. With the pondless drawing in “actual” size now, measure the length and width of your design from one end to the other. These measurements will tell you what size pondless waterfall kit you'll need. If we don't have a stock kit in your size, we'll happily create a custom kit for you - just give us a call or an email.
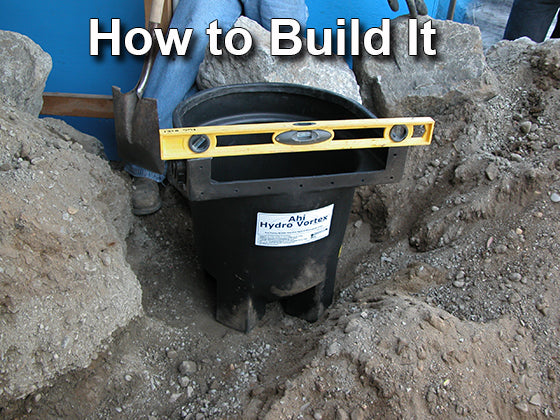
With your pondless waterfall kit on site - you're ready to start. For this particular pondless waterfall - we're using an Ahi Series pondless waterfall with 20' stream kit with the HydroFlush™ self cleaning backwash system.
The first step is to create a level and firm are for the Hydro Vortex™ filter. Once the ground under the filter is firm and level you're ready to proceed with hooking up it's plumbing lines.
Your Hydro Vortex™ filter comes complete with all fittings and a tube of silicone sealant. The first step is to place a bead of silicone around the threads of both the inlet and drain pipe adaptors. (The Ahi Hydro Vortex™ filter has one inlet and one drain - the Marlin and Dolphin filters have two inlets and a drain. A plug comes with the larger filters to plug the unused inlet.)
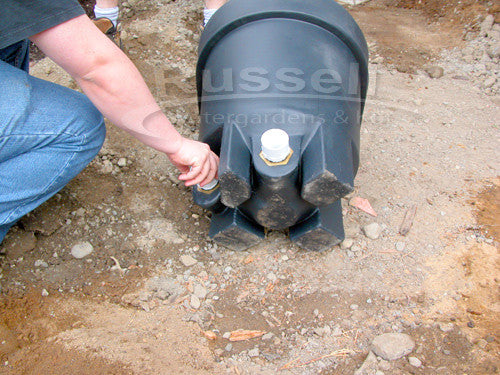
Hand tighten the siliconed male pipe adaptors into both the brass inlet port and the drain port of the Hydro Vortex™ filter. The drain port is located at the middle and bottom of the settling cone. The inlet is located above the drain port and off to the side of the filter.
You only need to "hand-tighten" these male pipe adaptors - no need to use a large wrench. Once you've tightened the fittings as much as you can with just your hand - that's enough. The silicone on the threads will prevent any possible leaking.

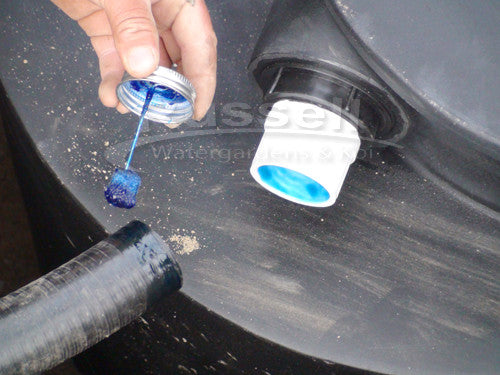
Your kit will include both Red Hot PVC primer and PVC glue.
Prepare the insides of the male pipe adaptors with a light coating of the PVC primer. Prepare the outside ends of the flexible PVC pipe with a light coating of PVC primer.
After a few seconds, the primer will dry. Once the primer is dry, apply the PVC glue to the end of the flexible PVC pipe. Makes sure to go all the way around the pipe - leave no gaps in the glue. No need to apply glue to the insides of the pipe adaptors - only the outside of the pipe. With PVC glue only on the pipe, this will force extra glue out along the pipe - and not into the inside of the filter.
The Hydro Vortex™ filter comes with with 10' of 1½" flexible PVC pipe for the draining of the filter.
Apply PVC glue to the end of the drain pipe and insert it into the primed male pipe adaptor in the drain port of the filter. Give the pipe a slight "twisting" action as you're inserting the pipe. Hold the pipe in place for at least 30 seconds.
Repeat the process with the inlet pipe.

Upright the Hydro Vortex™ onto your previously prepared firm, level surface. Make sure the drain pipe is underneath the inlet mainline pipe.
Extend the drain pipe away from the filter to a designated area. Extend the inlet - or mainline pipe down one side of your stream to the spot where the HydroChamber™ will be located.

You will use the excavated soil from the HydroChamber™ to bury the pipe, to backfill around the Hydro Vortex™ filter, and to construct the waterfalls.
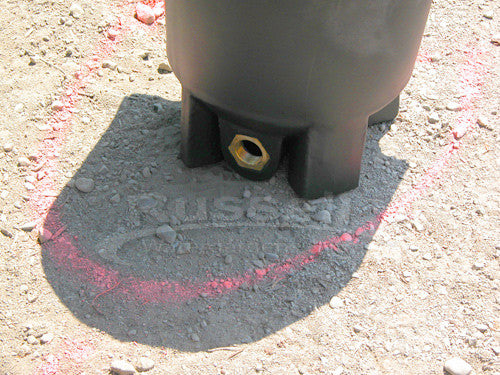
You will need some ballast weight inside the Hydro Vortex™ filter to keep it level while being backfilled. This is usually the job of the project supervisor!
If you don't have a project supervisor that can double as dead weight - uh - ballast weight .... then use some other heavy item such as a sandbag. If you do have a project supervisor, does that mean they're a sandbag?

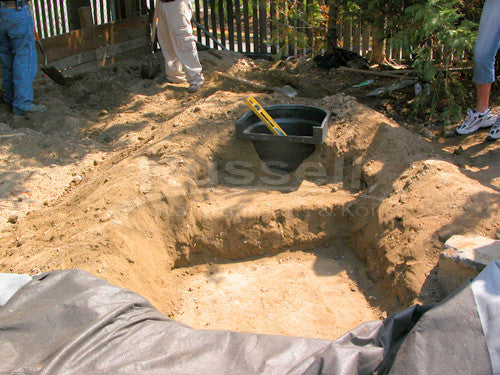
This diagram shows you the dimensions of the HydroSieve™ and HydroChamber™ site excavation.
You will reuse all the excavated soil in backfilling the Hydro Vortex filter, burying the mainline pipe, constructing waterfall stair steps, and to build stream "shoulders".
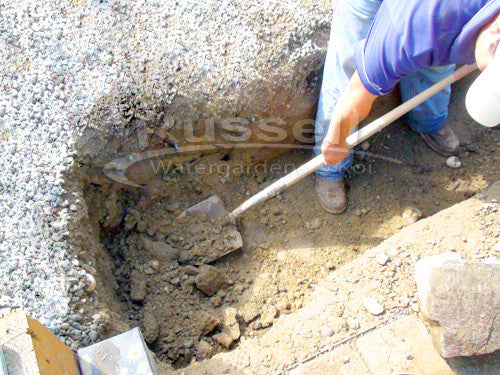
When excavating for the HydroChamber™, place the soil into a wheelbarrow for easy transfer to the where the Hydro Vortex™ filter is installed.
Your excavation will have two distinct depths. The deeper area is for the HydroChamber™ and the shallower area is for the HydroSieve™.
Use some of the excavated soil to bury your mainline pipe. Keep some of the soil nearby for later backfilling around the HydroChamber™ and HydroSieve™. The rest of the soil will get used creating stream shoulders, waterfall stair steps, and backfill around the Hydro Vortex™ filter.
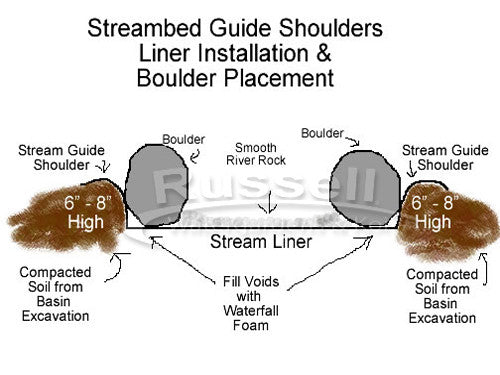
This diagram shows you what we mean when we say stream "shoulders". The stream shoulders are what hold the liner up that contains the water. The shoulders also prevent groundwater runoff from entering your stream. They help control unwanted dirty water from entering your stream.
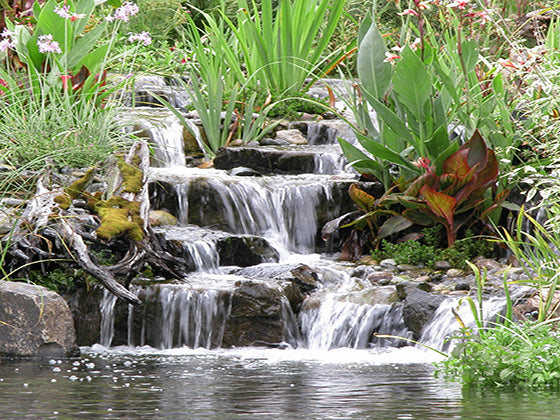
This photo shows you what we mean when we say waterfall "stair steps".
All this soil was from the HydroChamber™ excavation area. As mentioned earlier, we're using an Ahi Series pondless waterfall kit. The Ahi creates a waterfall height of 19½" by itself when on flat ground. So we're creating two waterfalls by building one stair step with soil from the HydroChamber™ excavation.
Simply compact soil into your desired waterfall height and makes sure that the waterfalls have "shoulders" just like the stream.
With your stream and waterfall soil work shaped the way you want it, and the soil is firmly compacted - next comes the underlayment.
Lay the underlayment over your stream and shoulders from the end of the stream to the base of the Hydro Vortex™ filter.
Smooth out any large wrinkles. It is OK to cut underlayment into pieces to better fit your design. The underlayment does not hold water, so the pieces don't need to be seamed together. The underlayment is to protect the rubber liner from the ground.
Before laying the underlayment over your waterfall stair steps - make sure that the stairs and shoulders are firmly compacted.
A common mistake that people make is that they do not make shoulders on the sides of the waterfall stair steps. Then when their rockwork is complete and the turn on the pump - they get a leak off the sides of the waterfalls.
Notice in this photo how we have made sure that the shoulders are above the waterfall steps.
With the waterfall stairs and shoulders double checked and compacted - go ahead and install the underlayment.
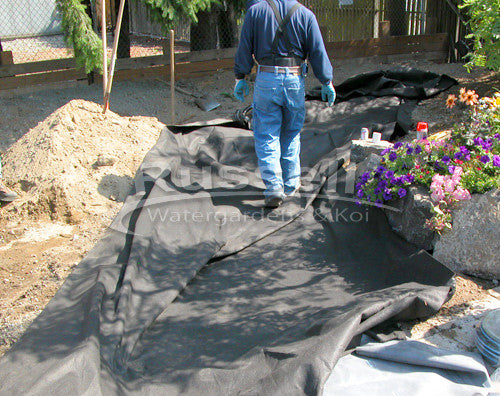
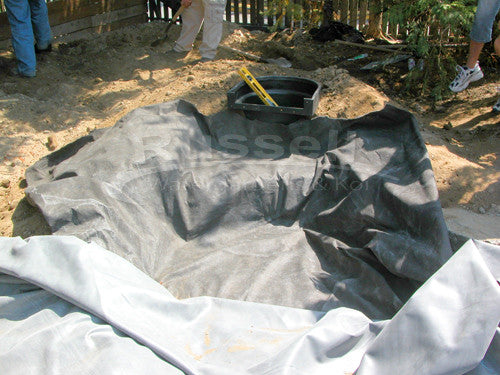
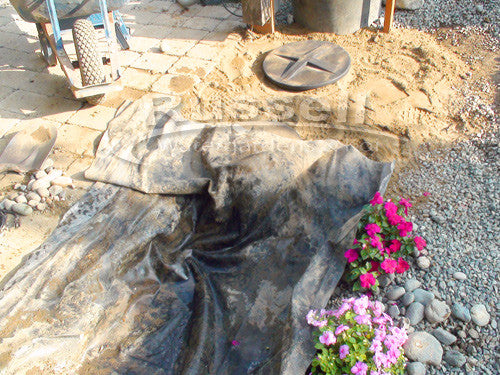
With the underlayment installed from the end of the stream to the base of the Hydro Vortex™ filter - install the rubber liner over the underlayment.
The liner does hold water - so keep it in one piece or you will have to seam it together. Lay the rubber liner out over the shoulders, over the Hydro Vortex™ filter, and over the HydroSieve™ location.
!!! DO NOT CUT OFF EXCESS LINER AT THIS POINT !!!
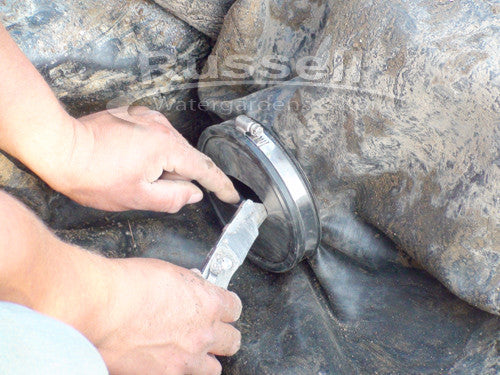
Attaching Rubber Liner to the Hydro Vortex™ Filter
The first step in attach liner to the filter is to clean the filter's "U" shape waterfall opening with the PVC primer that is included with your kit.
Clean the entire "U" shape face on the outside of the filter - including the screw holes. This will remove dust and other contaminates to ensure a tight and leak free liner attachment.
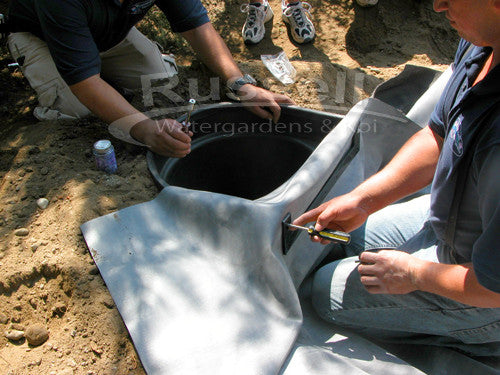
Lay the liner up and over the face of the filter. Press the liner gasket flange up to the liner. Using an awl, poke through the upper left, and upper right screw holes of the liner gasket flange. Align the gasket flange with the screw holes of the filter. Push a Phillips head screwdriver the the gasket flange, liner, and into the filter screw hole. Leave the awl through the other upper corner of the flange, liner, and filter.
Make sure there are no wrinkles in the liner between the filter and the gasket flange.
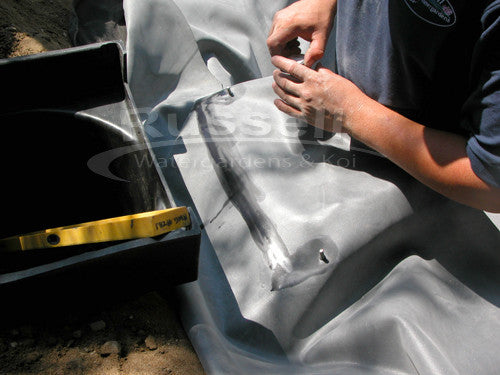
Keeping the screwdriver and awl in place with the flange and liner - pull the liner and gasket flange back to expose the backside of the liner. Using the PVC primer once again, clean the backside of the liner where the liner gasket flange is connected. Clean the face of the "U" face of the filter once more. Keep the awl and screwdriver in place for the next step.
Let both surfaces dry for about 60 seconds.

Using the silicone that you previously used on the male pipe adaptors - apply a solid bead of silicone inline with all the screws holes of the Hydro Vortex™ filter. From the upper left side of the "U" to the upper right side. Make sure the bead of silicone is solid - with no gaps - and over each and every screw hole of the filter.
Any gap in the silicone may become a leak.
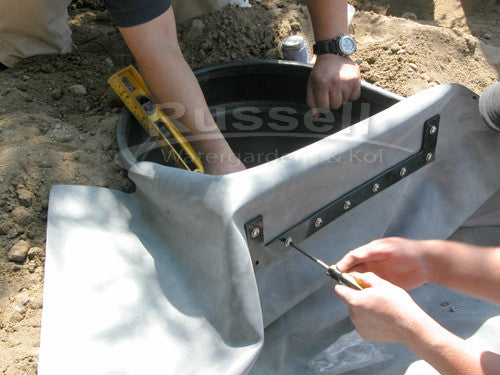
With the screwdriver and awl still in places, press the liner gasket flange and liner to the face of the Hydro Vortex™ filter. Align the screwdriver and awl with the upper outer screw holes.
While pressing the flange against the filter, remove the screwdriver and poke a flange screw with washer through the flange, liner, and into the filter. Loosely affix a nut on the inside of the filter. Do not tighten nut at this point. Repeat the process with the awl.
With the two screws holding the flange and liner in place, go ahead and use the awl to poke holes through the remain screws holes of the flange. Insert screws with washers to the remaining holes. Once you have screws inserted in each and every hole, you can go ahead and tighten the nuts.
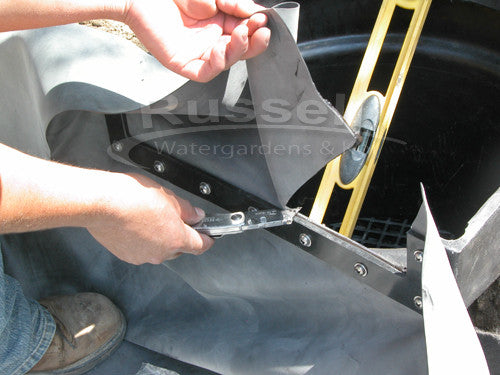
Use a razor knife to cut the liner out of the "U" opening of the Hydro Vortex™ filter.
!!!Do not cut more than just the "U" at this point !!!
Smooth the silicone that has squished out.
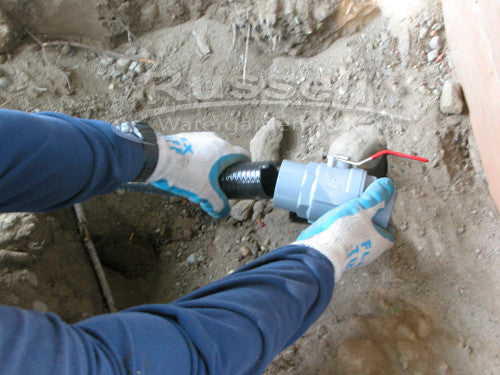
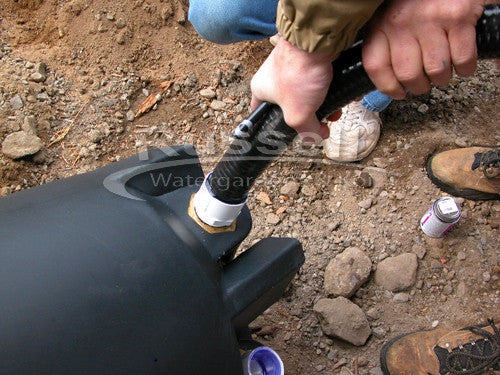
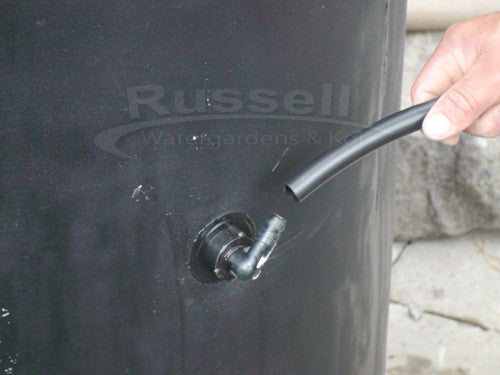
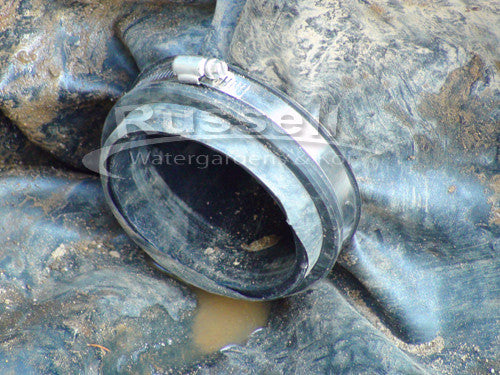
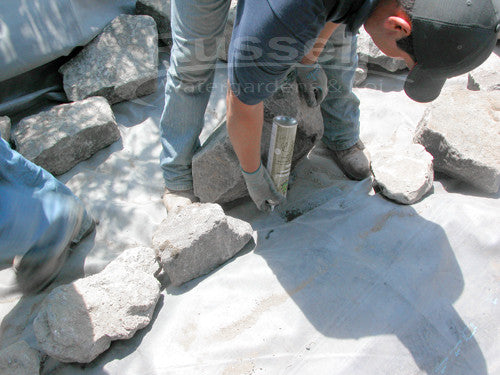
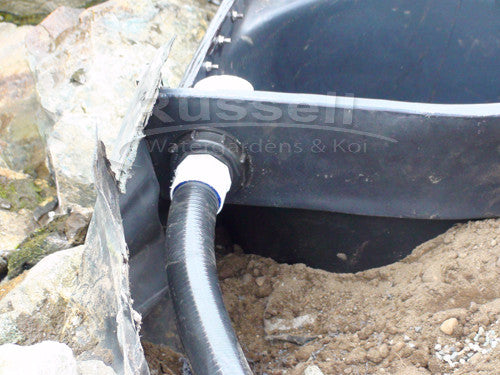
Time to attach the drain pipe shut-off lever valve. Using the PVC primer, clean the end of the drain pipe, and the inside of one end of the lever valve. When dry, apply glue to the pipe only - then insert into the valve. Hold for 30 seconds.
This lever valve is designed to be installed on it's side. When the valve is closed the lever points skyward. When the drain is open, the lever is pointing in the direction of the water flow. This way, to open the valve, you will push the lever forward and down. To close the valve, you will pull the lever up and back. This lever valve is much easier to open and close than twisting a traditional ball valve.
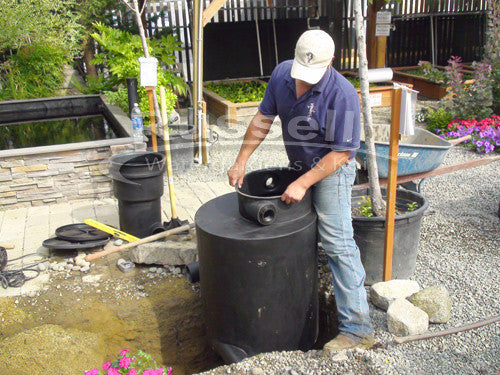
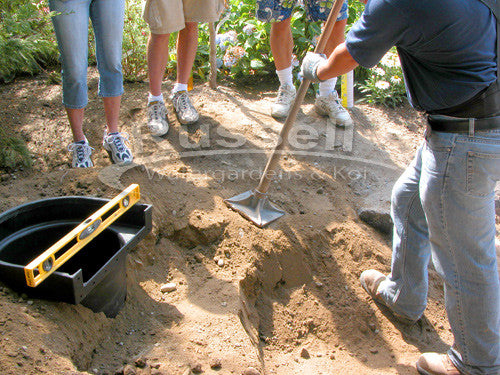
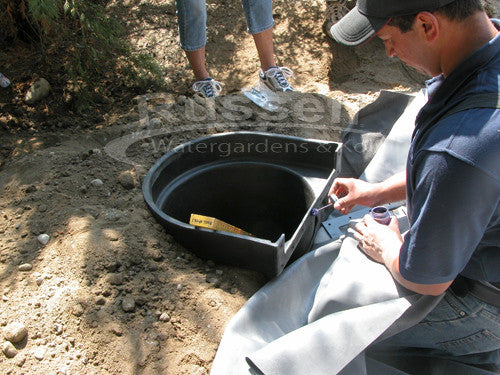
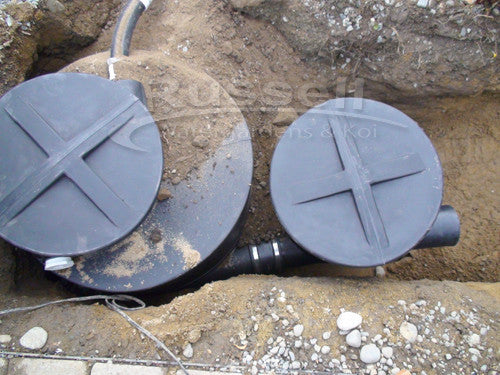
With the Hydro Vortex™ filter, underlayment, and liner installed - we can proceed with installing the HydroChamber™.
We've excavated to the proper dimensions, smoothed, leveled, and compacted the soil below the HydroChamber™. Simply lower it into place.
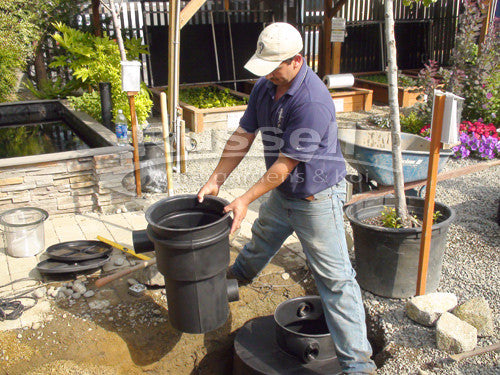
Repeat that last step but with the HydroSieve™. If you've made an accurate excavation, the outlet of the HydroSieve™ will be in line with the inlet of the HydroChamber™. If not, add or subtract soil under either unit to make sure the outlet and inlet align.
You also want the bottom of the HydroSieve™ inlet to be inline with the bottom of the stream.
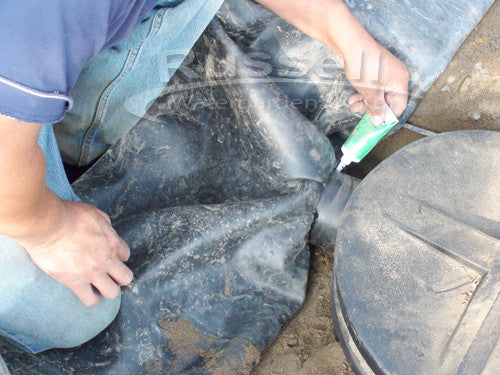
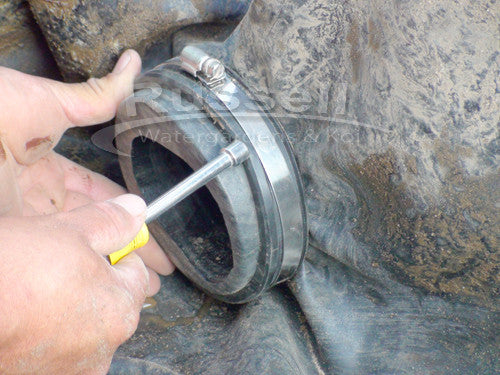
We know are ready to connect the two units with the 4" rubber coupler supplied in the kit. To connect the two units, again we use the PVC primer to clean the outlet of the HydroSieve™, the inlet of the HydroChamber™ and the insides of the 4" rubber coupler.
Once all the parts are clean and dry, apply silicone completely around the outlet of the HydroSieve™. Slide the 4" rubber coupler over the outlet pipe of the HydroSieve and tighten the stainless steel nut of the clamp.
Next, repeat the process with the inlet pipe of the HydroChamber. Push the HydroSieve™ and coupler together over the HydroChamber™ inlet pipe. Tighten stainless steel nut. Now the units are locked together.

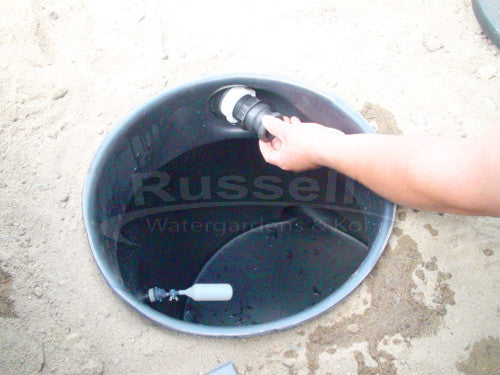
If you opted for the Auto Fill Valve Kit, now is the time to hook it up. Place a bead of silicone on the male threads of the ½" barbed fitting. Thread it into the ½" inlet port on the outside of the HydroChamber™.
As will all the fittings in this Ultimate pondless waterfall kit, you only need to hand tighten it. The silicone on the threads will prevent any leaking.
With the barbed fitting install on the HydroChamber, slide the ½" pipe onto the barb. No silicone or clamp is needed here. It helps to wet the barb and wiggle the pipe side-to-side while pushing it onto the barb.
At the other end of the ½" connect the brass hose fitting. Prior to attaching the brass fitting, place the stainless steel clamp over the pipe. Insert the brass barb into the pipe then tighten the nut of the clamp. The brass hose fitting can then attach to any water source that a garden hose can.

Install the float valve to the inside ½" port on the inside of the HydroChamber™. Remove the plastic nut from the male threads of the float valve. Remove the rubber gasket. Thread the plastic nut back onto the threads of the float valve with the flat section pointing outward. Install the rubber gasket onto the threads of the float valve outside the plastic nut.
Thread the float valve into the ½" port inside the HydroChamber. Hand tighten only. Once the float is threaded into the port with the gasket touching the port - turn the plastic nut so that it presses and locks the gasket against the port.

Apply a bead of silicone to the male pipe adaptor included with the HydroChamber™.
Thread the male pipe adaptor into one of the HydroChamber™ outlet ports.
Apply a bead of silicone to the threaded plug included with the HydroChamber™.
Thread the plug into the unused outlet port of the HydroChamber™.
You're now ready to connect the main line that connects the HydroChamber™ to the Hydro Vortex™ filter at the head of your pondless waterfall and stream.
As you did connecting pipes to the Hydro Vortex™ filter, use the same process to attach pipe to the HydroChamber™
Clean the inside of the pipe adaptor and the outside of the pipe with the PVC primer. Apply glue around the end of the pipe and insert it into the pipe adaptor - slightly twisting as you push it in. Hold for 30 seconds.
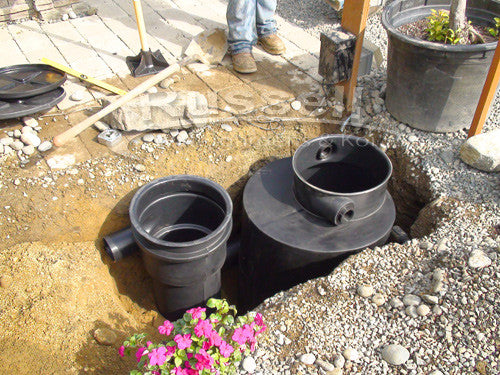
The HydroChamber™ and HydroSieve™ are connected together with the 4" rubber coupler. The HydroChamber™ has the Auto Fill Valve Kit installed and the main line attached with a plug installed in the unused outlet port.
This area is ready for backfill.
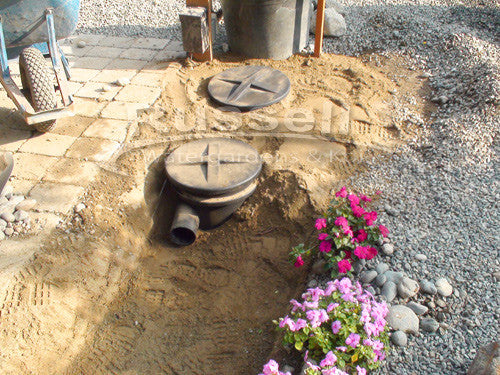
The water storage and pre-filter are in place. Now you're ready for the next step - connecting the stream liner to the HydroSieve™.
Lay the liner over the HydroSieve™ pre-filter.

Install the 4" collar over the liner and over the inlet pipe of the HydroSieve. Do not tighten collar yet. Make sure to pull wrinkles out of the liner underneath the collar.
Cut a hole in the liner 2" wide in the middle of the inlet pipe. The hole doesn't have to be perfect, it just needs to not extend to the rubber collar. You will stretch the liner over the pipe in another step.
!! Do not cut the hole any larger !!
Fold the liner back over the collar away from the HydroSieve™. Apply a bead of silicone around the inlet pipe just behind the collar. Then fold the liner back over the HydroSieve™.
Push the push the collar and liner farther onto the inlet pipe. The liner will stretch over the inlet pipe. Pull out an wrinkles in the liner around the inlet pipe.
When the liner is even with the end of the inlet pipe you're done! Tighten the stainless steel nut on the collar to lock it all down for a watertight seal.
If you are using a remote installation pipe, you'll connect the pipe to the inlet pipe of the HydroSieve™ with a 4" rubber coupler (and silicone). You'll attach the rubber liner to the other end of the pipe the same way we just attached liner to the HydroSieve™.
You're now ready to install your pump. Open the cam-lock of the check valve assembly. The male section of the cam-lock comes to you with plumber's tape on the threads. No silicone is needed here. Thread this part of the cam-lock directly into the same outlet port you have the main line pipe connected on the outside of the HydroChamber™. Once again, only hand tightening is required.

Attach the rest of the check valve assembly to the pump. It simply threads directly to the pump's outlet. One more time ... hand tighten only.
!!! DO NOT USE SILICONE OR GLUE OF ANY KIND HERE !!!
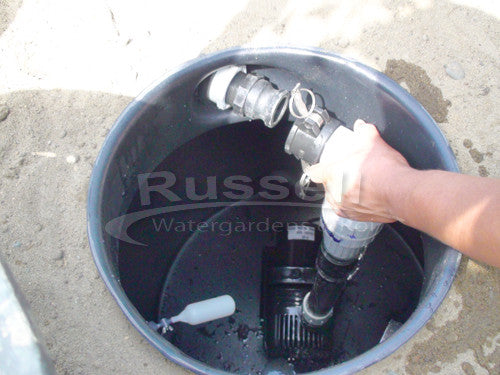
Lower the pump into the HydroChamber and reconnect the cam-lock section of the check valve assembly and you done! Your pump is installed.
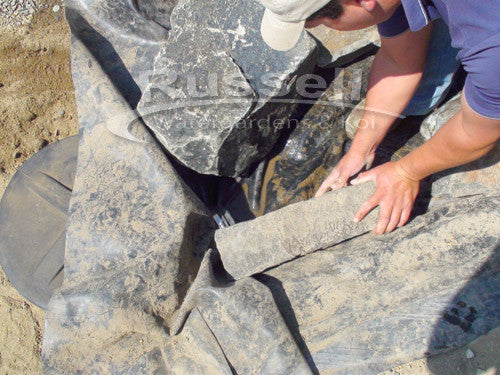
You can now start "rocking in" the stream. Line each side of the stream with various sizes of rocks and boulders in random fashion.
!!! DO NOT CUT OFF ANY LINER
UNTIL AFTER THE PUMP IS RUNNING !!!

"Dry-fit" all your streams rocks and boulders first. This way you can make changes until you are satisfied with the overall look of your stream.
Once you are satisfied with your stream rock placement. Lift each rock and spray a line of HydroFoam™ waterfall foam sealant under each rock. Also, fill any gaps between the rock and the stream shoulder.
This will force all the water down the middle of your stream where you can see it. You don't want water sneaking under the rocks or between the rocks and the shoulders - that's water flow you won't be able to see!

Build your waterfalls from the bottom up. Place larger boulders to the left and right of the waterfall, and select a rock that fits in between for the waterfall. Use smaller rocks as shims to level your waterfall rock. You want you waterfall rock to be as level as can be - otherwise you'll have an uneven water flow across your falls.
You will again use the HydroFoam™ sealant to make sure all your water flow goes over your waterfall and not down behind them.
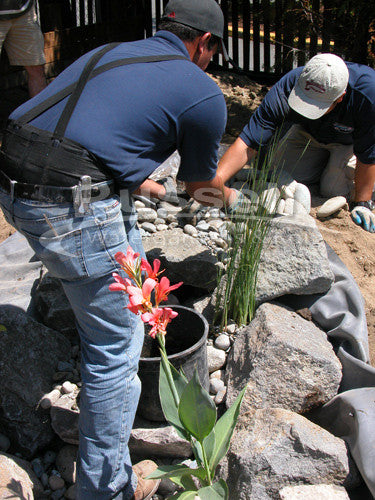
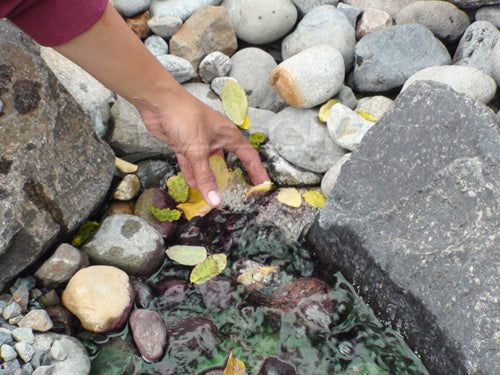
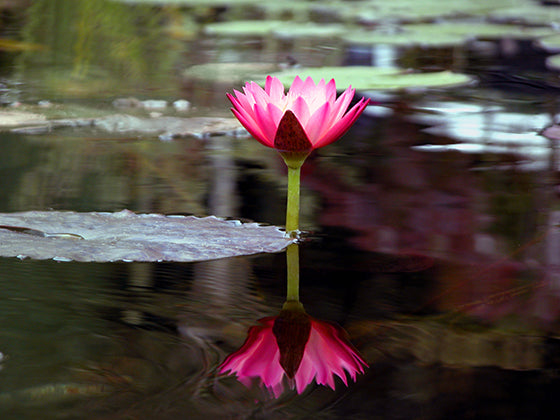
If opt for aquatic plants in your stream, now is the time to plant them - before you gravel the stream.
Here's how you plant aquatic plants:
- Remove the plant from its pot by pulling the pot off the plant, not the plant out of the pot! Place your fingers over the crown of the plant, turn the pot over so the plant is point downward. Give the pot a strong jolt downward with your fingers stopping the plant from falling out. Then pull the pot off the plant
- Break off most of the soil and/or mud from the root ball
- Spread the root ball out directly on the rubber liner
- Place river rock on top of the roots
- That's it!

If you opted for underwater lighting, now is the time to place the lights. Run the cords outside the stream shoulders.
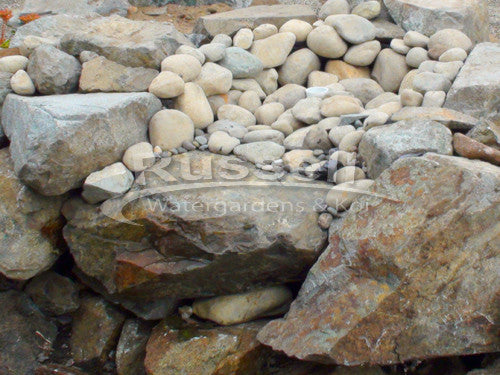
With all your aquatic plants planted and your underwater light fixtures installed - now you can proceed in graveling-in the stream. For the most natural looking gravel mixture - we recommend a mixture of rock sizes as demonstrated in this photo on the left:
- Pea gravel
- 1" - 2" river rock
- 4"- 8" river rock
You are also ready to add complete the Hydro Vortex™ filter. First, install the lower media grate, pour in the Hydro FilterSilk™ media, then install the upper media grate to hold it in place.
!!! Please take note that
WE STILL HAVE NOT CUT OFF THE EXCESS LINER !!!
For those of you who opted for manual backwash - you're done with your plumbing. Hand place river rock on the upper media grate to completely hide the filter as this photo demonstrates.
!!! DO NOT CUT OFF EXCESS LINER YET !!!
!!! DO NOT PLACE GRAVEL ON THE SHOULDERS YET !!!
Turn on you water source, fill the pump chamber to capacity then turn on your pump.
Only after the pump is running and you can see clearly every inch of the stream on both sides to make sure there are no leaks should you cut off the excess liner !!!! We cannot stress this enough!!
For those of you who opted for manual backwash - do nothing more until we tell you how, how much, and how to detail the shoulders after the next section that instructs on how to install the HydroFlush™ self-cleaning backwash system.
Installing the HydroFlush™ Self-Cleaning Backwash System
The HydroFlush Self-Cleaning Backwash System consists of a 3-way valve with valve box, pipe, a bulkhead fitting, and backwash froth jet. Here is how to install it:
- Locate an accessible area of the main line pipe
- Cut a 3" section out of the pipe
- Glue in the 3-way valve in line with the main line (like we taught you with the fittings ... primer all connection points, apply glue only to the pipe, insert into the female section with a twisting motion, hold for 30 seconds)
- Glue the HydroFlush™ pipe into the side of the 3-way as mentioned above
- Attach the HydroFlush™ white male pipe adaptor to the outside of the backwash bulkhead fitting at the top of the Hydro Vortex™ filter. (This photo shows it on the side, current generations have it in the middle back of the filter)
- Glue the HydroFlush™ backwash pipe into the white bulkhead at the top outside of the Hydro Vortex filter
- Attach the HydroFlush™ froth jet on the inside of the upper bulkhead

Glue the HydroFlush™ backwash pipe into the side outlet port of the 3-way valve. Place the valve and the pipes inside the include round valve box. Modifying the valve box with cutouts is recommended to fit over the three pipes. This is easy to do with an ordinary hacksaw. Cut lines in the valve box on either side where the pipes will be - then simply "break-out" the piece.
Attach the male pipe adaptor to the backwash port at the top of the Hydro Vortex™ filter. (Silicone the threads and hand tighten) Then glue the HydroFlush™ backwash pipe into the male pipe adaptor. (Prime the inside of the pipe adaptor and the outside of the pipe - apply glue to the pipe, insert pipe into the pipe adaptor with a twisting motion and hold for 30 seconds.)
As with the manual backwash, place river rocks on the Hydro Vortex™ filter's upper media grate to hide the filter and the HydroFlush™ backwash jet. Make sure not to cover the opening of the HydroFlush™ jet.
Time to Turn the Pump On!

The Hydro Vortex™ waterfall filter becomes completely invisible! This is an advantage you receive only with a Hydro Vortex™ filter. Another advantage is that the rocks hiding the filter don't have to be removed in order to clean the filter. Manual and HydroFlush backwashing the filter is accomplished while the rocks remain in place. No other waterfall filter provides you with these advantages.
Finishing Up
- With the pump running, check for water running over any of the stream shoulders
- If water is running over a shoulder - lift the liner and pack soil under the liner say that it will be above the water line
- With the pump running, check for water leaking through any folds or wrinkles in the line - especially in curves in the stream
- If water is running out a wrinkle - pull out the wrinkle or lift the liner and pack soil under the liner so the wrinkle will be above the water line
Final Detailing - Now We Finally Cut Off Excess Liner
- Cut the liner no closer than 6" from the stream rocks on both sides of the stream and waterfall
- Fold the remaining 6" of extra liner under itself - to about 3"
- Cover the remaining 3" of folded liner with the same rock mix used inside the stream
- Landscape up to the rock mix on the sides of the stream, waterfalls, and equipment
Congratulations! You Just Learned
How to Build a Pondless Waterfall and a Stream